Bike
This is the part of the sport triathlon that costs the most. You have your budget, so do not be swayed by bike retailers to buy the dearest in the shop.
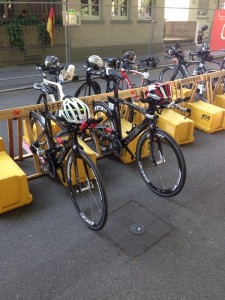
After seeing the expense involved, you may start thinking triathlon training is too expensive for you, but don’t be dismayed by the costs. If necessary, you can devise cheaper ways to approach your triathlon needs. First I would talk to friends – they may have equipment you can use
There are so many different bikes on the market today, and they have changed so much in the last decade.
The most important factor is that the bike and rider must fit each other perfectly. The rider’s position has to combine comfort, mechanical efficiency, and good aerodynamics.
Whichever bike you buy, you should consider whether you could alter the style, position and technique to compete on a variety of surfaces and gradients, and on courses of different severity and distances.
Check out various websites – do your homework!
Some Triathlon Specific Stores offer various packages, which include a range of equipment. Example: Bike, Helmet, Shoes, Pedals, Tri suit, Wetsuit and goggles.
If your only option is a second hand bike, here are few things to look out for:
Frame:
- Check for any cracks around all the joints, such as bottom bracket, and also check top tube and the forks. Sometimes little cracks will appear in these areas.
- Check the history of the owner and the bike – how many owners etc.?
- Check for any dents or large marks on the frame.
Wheels:
- Spin the wheel and look for any obvious signs of buckling.
- Check the rims for any kinks or dents.
- Listen for any grinding or noises when spinning, as this could indicate either the bearings need replacing or it could be dirty.
- Look for any wear on the spokes.
- Always check the quick release and remove the wheels from the frame to check.
Tyres:
- Check for any cuts, bald patches or thread showing.
- Check the rims or sidewalls to ensure that the stitching is not chafed or cut.
Brakes:
- Check that the brake blocks are not worn.
- Check the cables are not frayed.
- Check the brake callipers are central on the wheel and not hitting the wheel rim.
Gears:
- Check that you can get into all the gears available and that the chain does not slip off the sprocket.
Chain:
- Check that the links are not stiff or cracked.
- Make sure that when you change gear that the chain is not to tight.
Saddle:
- Is it male or female specific?
- Is the saddle showing any signs of wear?
- Is there any metal showing through?
Try the bike out before you buy!
Lots of things to consider I know, but it is better to know before hand as replacements are going to add extra costs later down the line.
If in doubt ask a friend or a bike mechanic to check it out for you.
Check out www.TJ-Cycles.com for further tips and advice.
Find a good cycle shop that you trust and who employ qualified bike mechanics, always ask them to explain whenever you get any work carried out.
Check out www.TJ-Cycles.com for courses on basic maintenance workshops
You have decided on your bike – what’s next?
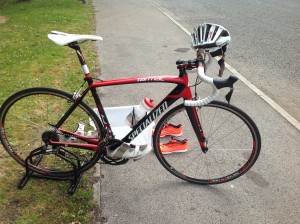
Setting the Riding Position:
The body can only transfer energy to the pedals if it is placed in the optimum position on the bike.
The points of contact are:
- Saddle
- Backside
- Pedal
- Feet
- Bars
- Hands
This phase of the triathlon is by far the longest, so making sure you are comfortably set up is very important.
Some athletes will prefer to be more aerodynamic as this section is non-drafting. Ultimately, power output depends on just two variables: Force and Speed. It depends how hard you push and how fast you pedal. The three forces you need to overcome to move forward are air resistance, rolling resistance, and, on climbs, gravity. Because gravity and rolling resistance depends on weight, most cyclists try to minimise weight. Rather than lose a few Kg’s they will go for a lighter bike and components, but this option comes at a much higher cost.
Rolling resistance depends on the road surface, as well as the make, thickness, and pressure of your tyres.
The biggest resistance force is air resistance, which is dependant on your speed and frontal surface area.
The most effective way to reduce air resistance is to draft behind another rider [or even next to]. For a triathlete this is not an option as most races are non-drafting and it is not permitted.
See: www.britishtriathlon.org to check out drafting rules. Caught drafting is either a penalty or disqualification. Also check the individual rules of the race you have entered.
Reducing frontal area has the greatest effect on performance.
There are so many things that you can change to become more aerodynamic – such as bike frames with tear-shaped tubes, aero-shaped helmets, deep-dish wheels and discs, narrow water bottles, skin tight suits – all these can reduce some of the frontal load.
However, a rider’s body is by far the biggest obstacle. A bike fit for a triathlete is therefore optimised with biomechanical fit and aerodynamic positioning. Some triathletes choose to ride in a less comfortable setup in favour of better aerodynamics.
More importance should be placed on their biomechanical fit, comfort, and bike handling skills.
A simple way to adjust to aerodynamic and also more cost effective investment is a set of aero-bars.
Being set up correctly on your road bike is a good investment. Speak to your local bike dealers or Bike Mechanic.
Try and remember to keep the core steady, solid and have soft shoulders with a slight elbow bend. Too much tension can cause fatigue [see strength and conditioning].
Once you are set up on your bike and you are near perfect to your aerodynamic position, there are other ways to increase speed.
The obvious one is fitness, but this is useless without the correct choice and use of gears and cadence. The secret of fast cycling is finding the perfect trade-off between the size of the gear used and the speed of pedal revolution [RPM].
The two mistakes usually made during a race, is either selecting a big gear and being forced to pedal so slowly against a high resistance that can cause fatigue almost immediately, or another is overspinning; that is selecting too small or low gear, with a high cadence [RPM] you will make little progress.
Some important points to consider:
- The use of high gear tends to be a strength exercise.
- Recovery rate on low gears is faster than on high gears.
- The constant use of high gears in time trials may restrict the athlete to complete successfully in triathlon.
- The use of low gears, from a young age tends to develop suppleness and flexibility in an athlete.
- Triathletes tend to use lower gears as they have to consider the run afterwards
- If in doubt, it is always better to gain skills and a better understanding of your gears.
A rule of thumb that I was always taught – to determine my best cadence:
If the heart is pounding, the revs are too high.
If the leg muscles [Quadriceps] are crying out for relief, the gear is too big and the revs are too low.
It is worth experimenting with the gears. Try a higher gear occasionally, to find out if you can cope with it at the same cadence.
Training gears are almost always lower than racing gears, to teach quick pedalling. It is preferable and also kinder on the knee joints, to use medium gears and pedal quickly than to use large gears and pedal slower.
Pedalling Technique:
Novices in cycling and Triathlon tend to use an up-and-down pedalling action. They should persevere in trying to achieve a smoother circular action, which will engage and bring into play the hip flexors and hamstrings rather than purely relying on the quadriceps and the gluteal muscles.
This technique will delay any onset of fatigue in the quads, which is particularly important for triathletes who have to run after immediately getting off the bike.
Try this task:
Close your eyes and imagine a circle in your mind: Your foot is at the top of the circle – forward action – drive down to the bottom of the pedalling action – backward [imaging pulling your heel into the back of your shoe] – then recover to the top of the circle.
The perfect pedalling action comes with experience, just remember to obtain the maximum from the pedalling technique, a smooth transition between each phase is essential.
While climbing steep hills you may have to get out of the saddle, relatively easy hills should be attempted by shifting down a gear or two and try and keep the same revolutions. Again this will come from confidence and experience when to sit in the saddle or get out of the saddle.
Braking:
You would normally apply both brakes together and with the same amount of pressure. Try not to aggressively apply the front brake as you could end up going over the handlebars. The same applies to the back brake as this could cause the rear wheel to slip away.
Cornering:
It is important to learn good cornering – With confidence and experience the less you slow down, the less speed you will need to pick up after the corner.
Here are one or two training tips I have picked up over the last 20yrs:
- If the corner is severe enough to make you stop pedalling, straighten the outside leg and bring the inside foot up.
- Keep the weight on the outside pedal, as this will give good friction and traction from tyre to road.
- Lean your body and bike into the turn and maintain that position to stop the bike from drifting outwards.
- Keep the body relaxed [but not so that you lose control!]
- Take extra care in wet or slippery conditions, especially over metalled grids or drain covers. Also be aware, when it has been raining the roads tend to get very greasy – a heavy ‘Slick’ condition forms and can cause all sorts of hazards.
- Loose gravel, stones or sand are another form of hazard you will need to take into consideration.
- The straighter possible line, affords the quickest exit and keep the bike more upright and less likely to slip.
- Brake or adjust speed before the bend, braking while cornering- especially if the bike is at an angle to the road- this tends to lead to wheel slip and a possible fall.
- Also if there is a sudden uphill just past the corner, change gear on the approach to the bend and pedal, not at the bottom of the hill.
Hill Climbing:
It is better to stay down in a good aerodynamic position on ‘easy’ climbs, but some hills will cause the rider to get out of the saddle the whole time and some will be in between.
To get up the, ‘in between’ hills, these are hills too easy for the all-out, but too steep to stay in the saddle.
- Approach the hill, change down to a gear that is suitable for the first part of the hill; Continue pedalling
- As you reach the bottom of the hill, get out of the saddle and really pedal that gear, to get the bike started up the hill.
- Stay out of the saddle, pushing and pulling the pedals around, developing a steady rhythm and breathing correctly.
- If the hill is long, change down [if needed] and sit well back in the saddle, pulling on the handlebars for extra leverage, pushing and pulling the pedals.
- A final out of the saddle spurt will see you over the crest of the hill.
- Take a breather, in the saddle, change up a gear to get your breath back.
- On the descent, adopt a seated low position, and continue pedalling, changing up a gear where necessary.

